Setting up WinRM via Active Directory:
Objective
This procedure provides instructions to automatically enable WinRM with HTTPS via Active Directory group policies.
Attune uses WinRM to execute commands on Windows desktops and servers. WinRM, combined with improvements in PowerShell Cmdlets is Microsofts emerging solution for scriptable administration of windows servers.
Note
If you don’t have a domain and the target computers joined to the domain, then this procedure isn’t for you.
Note
This setup is straightforward with defaults, your corporate environment may require alterations to the procedure.
Setup :
- Windows 2012 R2 Server, with Active Directory Domain Services configured.
- Target servers are joined to the domain.
Procedure
The following procedure all performed via a Remote Desktop session to the domain server.
Adding Certificate Server Role
- Open the Server Manager
- Select “Add roles and features”

Click through the “Before You Begin” screen
On the “Installation Type screen” :
- Select “Role-based or feature-based installation
- Click “Next”

On the “Server Selection” screen :
- Select the server to install the Certificate service on
- Click “Next”

On the “Server Roles” screen:
- Select “Active Directory Certificate Service”
- On the popup, click “Add Features”
- Click Next.


On the “Features” screen:
- Click “Next”
On the “AD CS” screen:
- Click “Next”
On the “Role Services” screen:
- Click “Next”

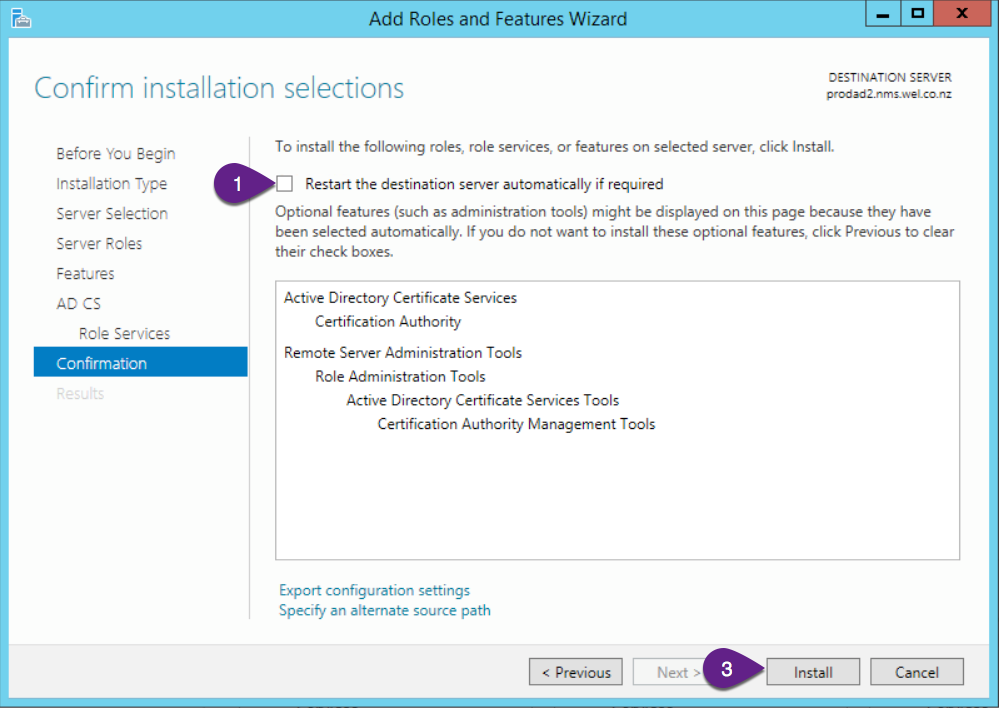
On the “Confirmation” screen:
- Check the “Restart the destination server automatically if required”
- Click “Yes” on the confirmation dialog.
- Click “Install”


The installation will proceed, break time.
On the “Results” screen:
- Click “Close”
Repeat the procedure for the other domain controllers in the domain.
Configuring Certificate Server Role
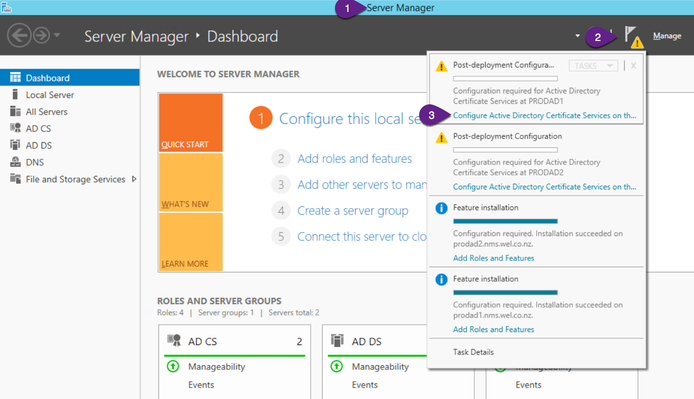
- Open the Server Manager
- Select “Notification” dropdown
- Click “Configure Active Directory Certificate …”
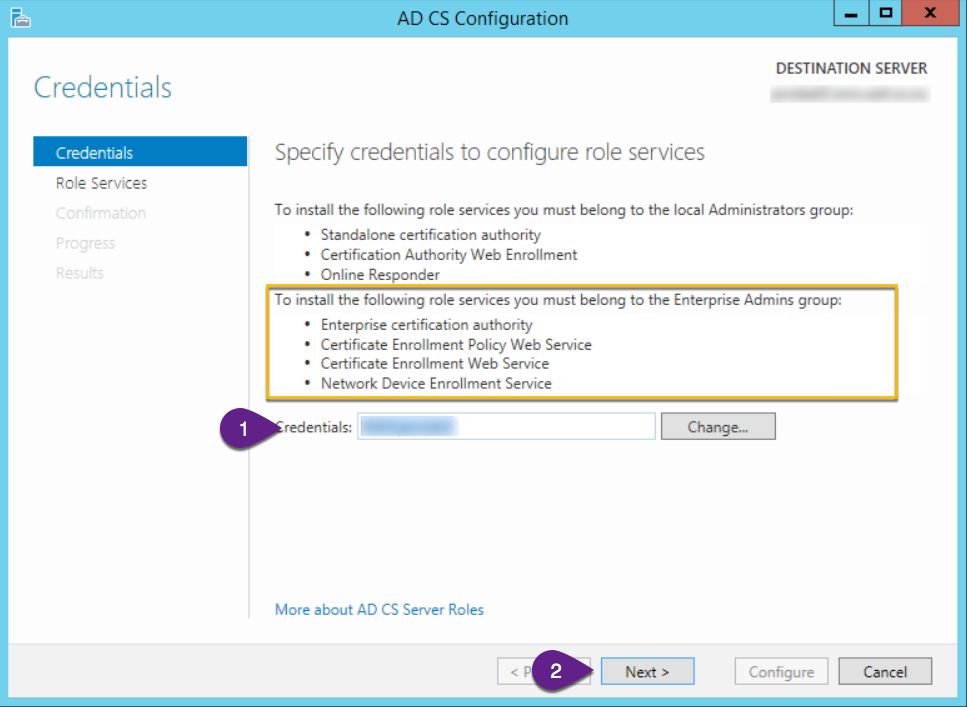
On the “Credentials” screen:
- Ensure you have entered a valid domain credential
- Click “Next”
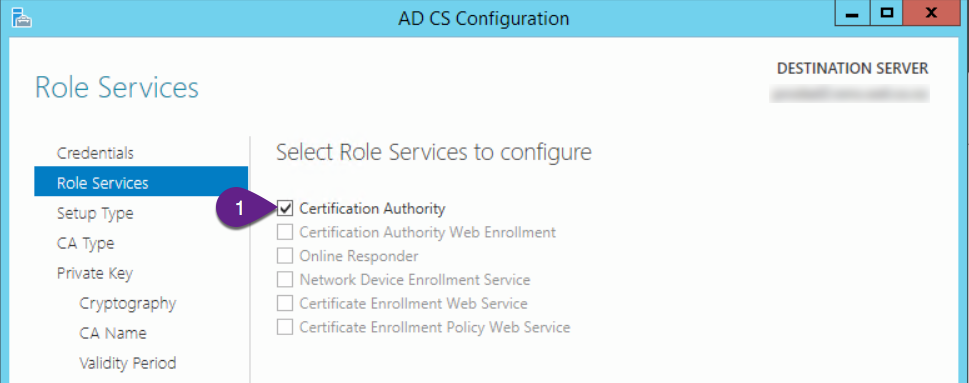
On the “Role Services” screen:
- Check “Certificate Authority”
- Click “Next”
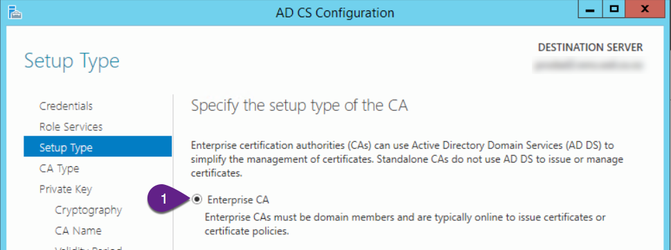
On the “Setup Type” screen:
- Ensure “Enterprise CA” is selected
- Click “Next”
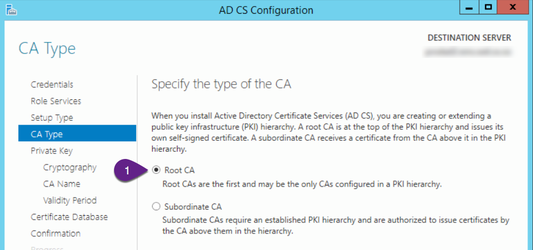
On the “CA Type” screen:
- Ensure “Root CA” is selected, or “Subordinate CA” if this is the second server your setting up.
- Click “Next”
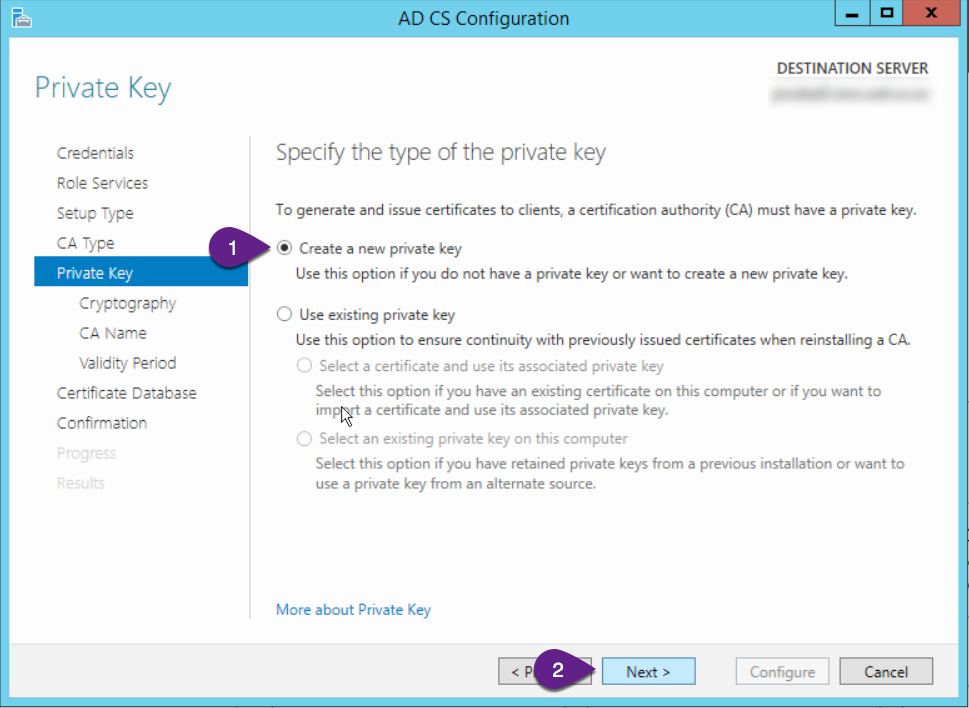
On the “Private Key” screen:
- Ensure “Create a new private key” is selected
- Click “Next”
If this IS the first server your setting up and the Root CA, skip this step.
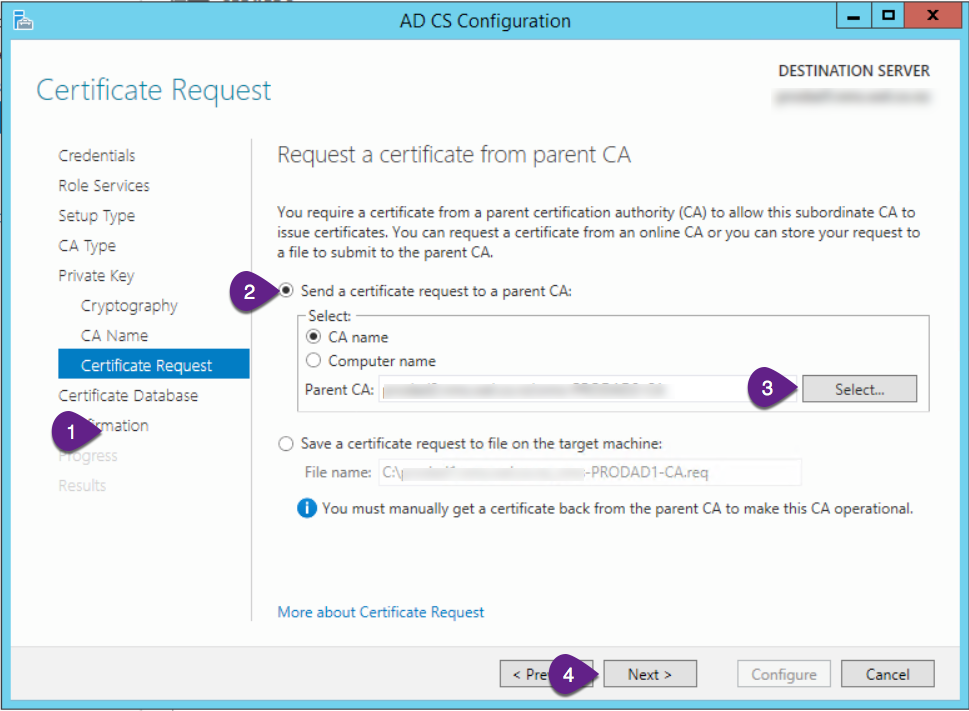
If this is the second server you’re setting up, it will be a Subordinate CA and need to request signing from the root CA.
- Select the “Certificate Request” on the screen list on the side bar
- Click “Send a certificate request to a parent CA”
- Click “Select”
- Click “Next”
- Click “Confirmation” on the screen list on the side bar
- Then click “Configure
Repeat the procedure for the other domain controllers in the domain.
When prompted at the “CA Type”, you will need to select “Subordinate CA” on the subsequent servers.
Configure WinRM Certificate Template
Note
Be sure to check the Certificate Services setting updates in the following section on all domain controllers.
Open “Certificate Authority” (Use the start menu search)
- Expand the root server
- Select “Certificate Templates”
- Right click and select “Manage”

In the “Certificate Template Console” app
- Find the “Web Server” template in the list
- Right click and select “Duplicate Template”

In the “Properties of New Template” app
- Select the “General” tab
- Enter “WinRM in the “Template display name”

- Select the “Subject Name” tab
- Select “Build from this Active Directory information”
- Select “Common name” for the “Subject name format”
- Check “User principle name (UPN)”

- Select the “Security” tab
- Select “Add”

- On the “Select Users, Computers…” screen:
- Select “Object Types”
- On the “Object Types” screen
- select “Computers”
- click “Ok”

- Back on the “Select Users, …” screen, Enter “Domain Computers” in the “Enter the object names to select” box
- Click “Check Names”
- Click “Ok”

- Back on the “Properties” screen, Select “Domain Computers”
- Select “Enrol”
- Select “Autoenroll”
- Click “Ok”

Back in the “Certificate Authority” app
- Right click on “Certificate Templates”
- Select “New”
- Select “Certificate Template to Issue”

On the “Enable Certificate Templates” popup:
- Find and select the created “WinRM” certificate template.
- Click “Ok”

Create the Group Policy Object
The group policy object will automatically enable WinRM on Windows operating systems joined to the domain.
Open the “Group Policy Management” app
- Expand the Forest
- Expand the Domains
- Expand the Domain
- Select the “Group Policy Objects”
- Right click and select “New”

On the “New GPO” dialog
- Enter “Configure WinRM” in the “Name” field
- Click “OK”

In the “Group Policy Objects” list:
- Right click on “Configure WinRM”
- Select “Edit”

Enabling Autoenroll of Certificate Services
In the “Configure WinRM” Group Policy:
- Expand “Computer Configuration” → “Policies”
- Expand “Windows Settings”
- Expand “Security Settings”
- Select “Public Key Policies”
- On the right hand pane, double click “Certificate Services Client – Auto-Enrollement”

In the “Certificate Services Client – Auto-Enroll…” properties:
- Set “Configuration Model” to “Enabled”
- Check “Renew expired certificates…”
- Check “Update certificates that user certificate templates”
- Click “OK”

Configure Enrolment Script
Expand the following
- Expand “Computer Configuration” → “Policies”
- Expand “Windows Settings”
- Expand “Scripts”
- Double click on “Startup”

On the “Startup Properties”
- Click “Show Files”

In windows explorer
- Click “View”
- Ensure “File name extensions” is checked
- Right click on a blank space in the window
- Select “New”
- Select “Text Document”

In windows explorer
- Rename the file to “enable_winrm_https.bat”
- Enter the following as the file contents
winrm quickconfig -q -transport:https3. Save the file and close notepad
4. Close windows explorer

Back at the “Startup Properties” screen
- Click “Add”

- On the Add Script Diaglog
- Click “Browse”
- Select the “enable_winrm_https.bat”
- Click Ok

2. Click “Ok” on the Startup Properties dialog.
Configure Firewall for WinRM
Expand the following
- Expand “Computer Configuration”
- Expand “Policies”
- Expand “Windows Settings”
- Expand “Security Settings”
- Expand “Windows Firewall with Advanced Security”
- Expand “Windows Firewall with Advanced Security – ….”
- Right click on “Inbound Rules”
- Click “New Rule”

On the “New Inbound rule Wizard”
- Click “Predefined”
- Select “Windows Remote Management”
- Click “Next”

On the “Predefined Rules” screen
- Click “Next”

On the “Action” screen
- Click “Finish”

Enable WinRM
Expand the following
- Expand “Computer Configuration”
- Expand “Preferences”
- Expand “Control Panel Settings”
- Expand “Services”
- Right click on “Services”
- Select “New
- Select “Service”

On the “Predefined Rules” screen
- Change “Startup” to “Automatic (Delayed Start)”

- Change “Service name:” to “WinRM”

3. Click “OK”
Tweak WinRS
Expand the following
- Expand “Computer Configuration”
- Expand “Policies”
- Expand “Administrative Template Policy”
- Expand “Windows Components”
- Expand “Windows Remote Shell

In the Settings pane:
- Enable and Set “Specify maximum amount of memory in MB per shell”, to 1024
- Enable and Set “Specify maximum number of processes per shell”, to 64
- Enable and Set “Specify maximum number of remote shells per user”, to 64

Linking Group Policy
The group policy is now complete. Link the group policy to the desired OUs, and reboot the target servers.
Complete
This procedure is now complete, You can Create new Windows Server values in Attune and set the WinRM specification to “WinRM 2.0 HTTPS”